Blue Water Re-rig
Replacement blue water standing rig for Camomile
When to re-rig?
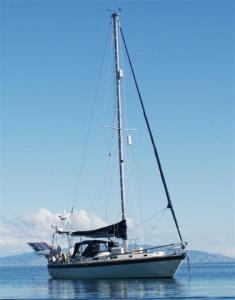
Camomile has a single spreader masthead sloop rig with a baby stay and 2 lowers. She had her previous re-rig in February 2004 so the standing rig was 8 years old when it was replaced in March 2012. More importantly than age though, 4 of those years had been “blue water” sailing which had been mostly in the warm salty conditions of the tropics, not to mention the time spent near volcanic islands where the acid rain would tend to colour the stainless a light hue of brown. On the up side we have not been on a rally schedule for some two years now so we make passages only when we believe that they will be as comfortable as possible hence reducing wear and tear on the rig, the boat and most importantly, the crew!
In approximate terms the work the rigger had done for us the last time around had sailed us an estimated 35000 nautical miles in total. That’s nearly a circumnavigation or less than 10p per mile if you want to look at it like that.
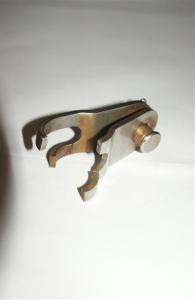
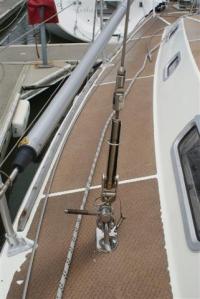
During this time we had experienced only one serious rig failure (yes! on a rally schedule…see https://yachtcamomile.wordpress.com/2010/03/05/on-to-galapagos/ ) however we did have four separate incidents with the lower shrouds. The one above resulted from a lower shroud toggle breakage after which I replaced all the toggle fittings with new ones.
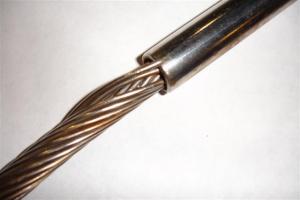
Then there was a broken strand just below the Tee bar terminal which I spotted before it became a problem so I responded by replacing both lowers and babystay with new shrouds.
Next, to my utter amazement, another (barely 6 month old) lower shroud toggle cracked but, happily, I spotted at sea before it caused a problem and it lead to the replacement of the toggles for caps, lowers and babystay with specially upgraded version supplied by the manufacturer FOC.
Finally, just when I was thinking that my re-rig did not need to include the less than 2 year old lowers and babystay, bought at great expense in Tahiti, I found another cracked strand in the same place as before and realised that these would indeed have to be replaced too.
My name may not be Sherlock but all this also told me that the three lowers were doing a lot of work and getting fatigued more quickly than you might expect. So no let-up in my inspection regime where I check the rig shroud by shroud before and after offshore passages or every six or so weeks, whichever comes first. Yes I may have learned paranoia but this doesn’t mean it won’t break. It also means that, as we get into more remote areas after our stop in Australia I needed to have the capability to replace or repair parts of my rig without relying on a local rigger of whom there may be none!
Quotes for a Re-rig
My chosen spot for re-rigging was New Zealand as firstly it fitted my timeframe, secondly they are well resourced with competent riggers and thirdly because they have a no quibble tax free status for foreign yachts.
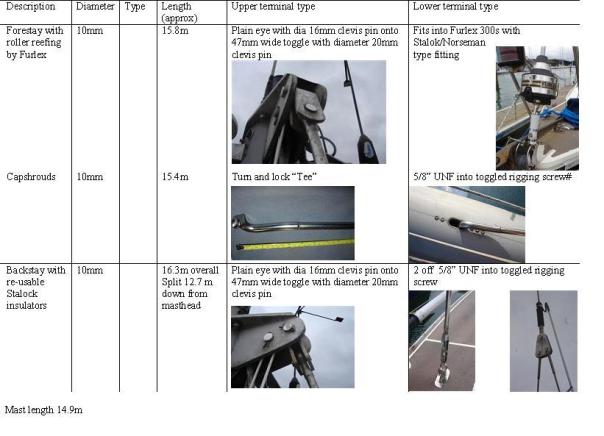
Before I had found the cracked lower strand I had decided to get 3 quotes and so put together a tabular request for quotation with basic details and photos which I sent to two companies I had dealt with before and also one to an independent rigger who worked within a chandlery and had impressed me with his knowledge at a seminar he had run plus his professional attitude and helpfulness at the shop.
Swaged vs Swageless Terminals
The results were interesting. Firstly it seemed a lot less expensive than I imagined
UK prices might be by now but, more importantly, the independent rigger adopting the expensive fittings of the swageless terminals turned out to be 40% less than the ones using the more common swaged terminals.
Swaged – NZ$3931
Swaged – NZ$3687
Swageless – NZ$2221
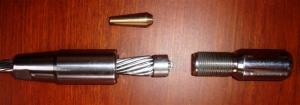
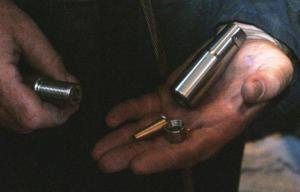
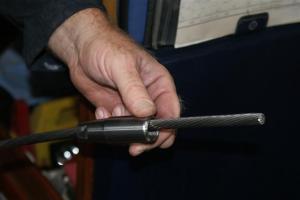
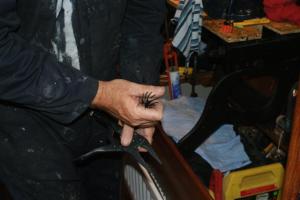
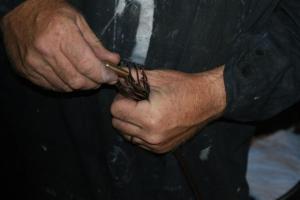
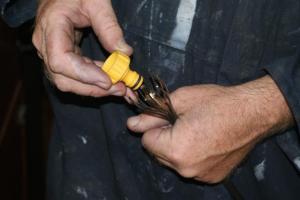
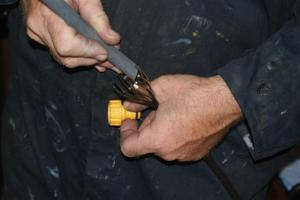
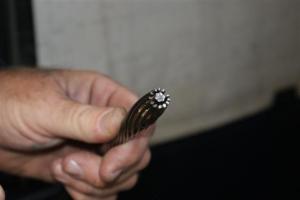
Swageless fittings are a type which do not rely on crushing the wire under great pressure into a hollow fitting but work by splaying the outer wires of the stay, inserting a cone onto the inner core then clamping this within a screwed body where a former bends the wire ends around the back of the cone. The beauty for me is that the loads within the strands are also splayed out and no intense crushing takes place as with the swaged fittings. From the research I did I discovered that they had a good reputation for reliability but also were possible to make up and fit with no specialist equipment and only moderate craft skills.
There was no doubt in my mind that the fittings looked robust and well engineered and unlike swaged fittings could be dismantled to inspect the strands within the fitting if anything looked amiss from the outside.
Finally the fittings can be re-used with just the replacement of the £5 cone which meant that not only was there an immediate cost benefit with this route but our next re-rig or any replacement of stay wires in the meantime would only involve cones and wire which I estimated to be only 50% of the material cost.
So a better quality, more adaptable, probably tougher solution which enables repairs without relying on a local rigger being available (and competent) for less money seemed like the route to go.
The downside? For his price the independent rigger would make the terminals and rig the boat with me working along side him i.e. free labour hence the lower prices to some extent I guess. However, to me, this seemed rather good because I could learn about putting the rigging together and in any event, while I am not working, why not spend time earning a saving on the cost of re-rigging?
Choosing the materials
The next stage was to choose the swageless fitting and wire. There were 3 makes of swageless fitting readily available to me. Stalok, Norseman and Searig and I already had 2 Norseman terminals and 5 Stalok which were situated on my detachable inner forestay and on the backstay insulators.
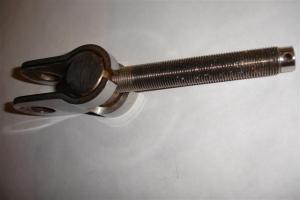
Despite this I chose to go with the local Searig product by KZ Marine in Auckland because they could supply swageless latch and turn “Tee” bar fittings which seemed to be missing from the other catalogues. I also chose to replace all my rigging screws as the old ones were looking a little tired.
Wire was an easier choice as Navtec was readily available in 10mm 19×1 thus avoiding the need to buy product from China which is common in these parts but still suffers a reputation for poor quality.
I then considered what to do about the forestay. With it’s roller furler this is the one wire on the rig that I can’t do a regular visual inspection on so it was a priority for replacement. It is also the most complex shroud as the lower end is buried in the Furlex drum and the upper carries an extruded bearing which should be replaced if worn. I talked at length to the experts on this and discovered after taking a close look at the top end that a swageless fitting was not possible here as the swage sits down within the alloy foil forming part of the rotating bearing surface. One of the riggers just a stones throw from our mooring solved my problem. They quoted a very reasonable price to strip and change out the wire if I provided the materials, they would help me walk it to and from the boat plus I could “help” them so that, next time around, the process would not be a mystery to me.
Replacing the Rig
The process of replacing standing rigging when I last had it done in the UK involved un-stepping the mast. In New Zealand it appears to be common practice not to do this albeit the job is usually carried out on a marina berth and in settled weather. I am not sure why this difference in approach, but it did mean that I had to think carefully about how I stabilised the rig while each shroud was replaced particularly as I obviously had to go aloft to detach and re-attach them all.
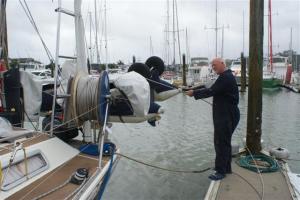
For the forestay this was easy, all I had to do was rig the detachable inner forestay, slack the backstay slightly and tug the lower end down to release the clevis pins from the toggles. Back at the top of the mast a gaffer taped rolling hitch attached to the spinicar halliard enabled the stay to be lowered with the 2 helpful riggers walking the stay, foil and furler off down the pontoon with the minimum of bend being put in it as it was taken to the workshop.
Watching a pro do a job is always a pleasure and this occasion was no exception. He pulled the furling drum and foil apart deftly giving me pointers all the way. The job, end to end took about 45 minutes before we were walking back down to the boat with the re-built foil on our shoulders and within 3 hours of removing the first clevis pin the whole lot was back on again. I was also pleased to have seen that the old forestay showed no signs of stress or wear which made me feel better about it not being possible to inspect it in service.
One important thing I learned during this session however was that swaged terminals are used by riggers because they are quick when you have the specialised hydraulic or pneumatic equipment. It took easily less than 10 minutes to make the swaged joint and the best I achieved on a swageless fitting was about 35 minutes. The popular choice of swaged terminals is driven by these economics therefore and not necessarily by quality considerations. In fact this rigger said he had seen old, rusty, loose and abused swageless terminals that looked as if they had been put together by Blind Pugh but they had not “let go”.
For the rest of the shrouds I was to use swageless fittings throughout. I started by working with the rigger who was preparing another boat’s new rigging by the same method. We did around 6 terminals together and again there was nothing quite as good as watching a master at his work.
I took delivery of a large roll of 10mm wire and soon got stuck into making my own terminals where the process I used was:
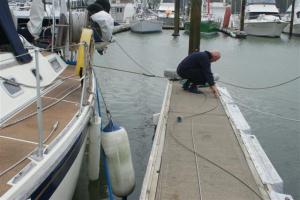
1) Run the approximate length of the stay out onto the wooden edge of the pontoon alongside the boat so that it lies in a more or less straight line (as with swaged terminals it is not good practice to make the joint with the wire coiled because this can result in uneven stresses on the wires where they meet the terminal)
2) Fit a swageless terminal to the end of the wire (see process below)
3) Stabilise the rig using the inner forestay and masthead halliards for the caps and the up haul for the lowers. (As an aside, the inner forestay was fitted to Camomile in order to have the ability to fly a storm jib without being forced to remove the genoa. It has not yet been used for this but was invaluable in the process of re-rig stabilisation, as part of my “Shroud Down Response” strategy ( https://yachtcamomile.wordpress.com/job-list/response-to-shroud-breakage/ )
and also, when on a long several hundred mile beat, I would set it to give confidence that if the relatively uninspected forestay came loose it was there to take the strain immediately).
4) Remove a stay and lower it to the deck
5) Put the old stay beside the new partly made stay and, allowing for the new swageless terminal, cut the wire to length
6) Fit the terminal
7) Hoist the new shroud up the stabilised mast and attach it at the top
8) Attach the new shroud at the chainplate and tension before moving to the next one.
Assembling a Swageless Terminal
The assembly of the terminals was easy if a little time consuming
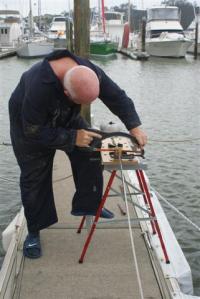
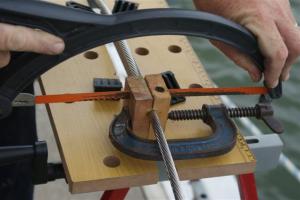
1) Wrap the wire in good quality masking tape to prevent it splaying while cutting with a medium/fine (preferably cobalt) hacksaw. I also made a small wood slitted cutting jig to keep my cut square and neat.
2) File the end clean deburr and cut a small chamfer around it.
3) Open up the swageless fitting to find it’s four components and pass the wire through the main collar.
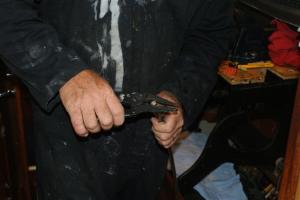
4) With a pair of Mole Grips open the outer strands of the wire evenly and press the conical wedge over the inner strands down to 1.5 wire diameters from the end (less for Stalok).
5) Close the outer strands back over the wedge
6) With a fine blade ensure that the wire strands are not sitting in the slits in the side of the cone. This is a critical point and is probably the most tricky part of the operation with the Searig cones which have more longitudinal compression slits than Stalok.
7) Assemble the former into the body of the fitting smeared with a good quality Teflon grease
8) Pull the wire back into the collar and ensure that the strands look evenly spaced
9) Assemble the former to the collar with the wire inside and finger tighten.
10) Using spanners wind the fitting together using one rotation forward and half a one back.
11) After several turns unscrew the body again and you should be able to see the wires being evenly formed around the inside of the collar and on top of the wedge.
12) Re-assemble again and continue with this process until the joint gets resistant. Do not over tighten, there is no need as, once the wire has trapped the conical wedge, it can’t get away.
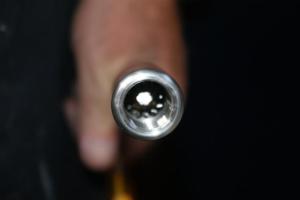
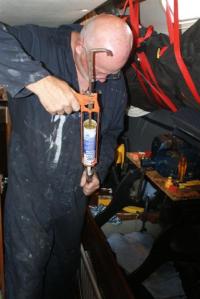
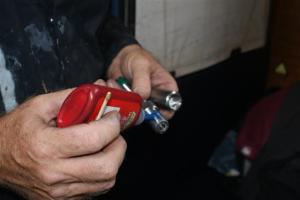
13) Dismantle the joint again, wipe out any excess grease and fill the collar with a medium strength deck calking mastic DO NOT USE SILICONE as the acidic solvent will rot the fitting from the inside.
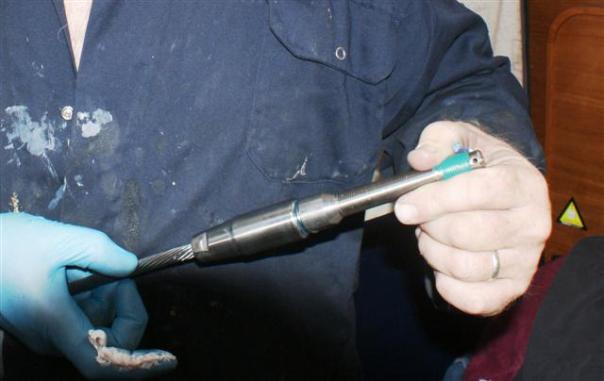
14) Apply a generous amount of medium strength Locktite or similar to the threads and re assemble the joint. The mastic will squeeze through the wire exit point sealing the joint against most water ingress, wipe the excess mastic and thread-lock off with a clean rag.
The joint is complete. Some manufacturers say that this last process is optional however having seen inside the Stalok joints that my previous rigger decided not to fill with mastic and observed the rusty former and wire end I can’t see why you would not, even though the joints in question were not really in any danger of being compromised
In the end, having tried Norseman, Stalock and Searig I have to say that Stalok are the easiest to assemble and this is largely to do with alignment of the cone’s slot within the wire however the Searig has more “meat” in it so looks a little more robust.
Spares Kit
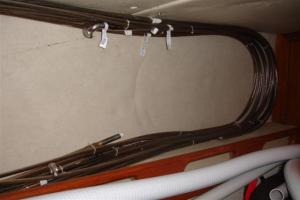
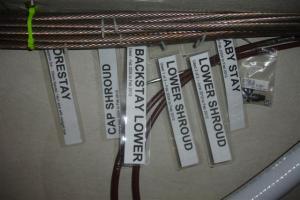
I also reassessed my spares inventory and in addition to my shroud down kit ( https://yachtcamomile.wordpress.com/job-list/response-to-shroud-breakage/ ) I bought a piece of 10mm wire longer than the longest shroud (the forestay) with a swaged terminal at one end from which I can make any stay on the boat by cutting and adding spare swageless fittings. I kept some of the old rigging to give me the option of a quicker “get me to the nearest anchorage” solution in the event of a breakage and the ability to copy the lengths while making new shrouds up. This is stored in a relatively compact space by the quarterberth (behind our bikes) and tagged for easy access. I also bought enough cones to do a full re-rig so next time around so, hopefully, all I will need to look for is some 10mm wire.
Summary
Overall this job would have been quite a quick job but for two factors. Firstly the weather, New Zealand’s weather is normally quite settled at the time of year I re-rigged however this year, the moment I ventured forth onto the deck with re-rigging intent in my eye, the heavens opened with a vengeance. This resulted in the work taking at least three times as long as it should have. Secondly the Tee bars at the top of most of my shrouds make it east to attach and detach but need to be carefully and accurately cranked so that the fitting pulls along the axis of the wire. This involved lots of trips to the local iron-fighter who had a hydraulic press and lots of patience. Next time around I may well replace these terminals with something less prone to misalignment.
I was pleased to find that there were no major issues with the old wire or fittings that I stripped off albeit rust in one Stalok backstay insulator due to not having been sealed and a loose collar in another due to no thread-lock being used.
By the time I had completed the re-rig I had made about 20 wire terminal joints and knew every clevis and split pin in the rig so now have not only the experience to know that regular checking of the standing rig is crucial but also the ability and spares set to do something about it in places where local experts may simply not be available.
How Long
All in all I took a period of 10 days working alongside the marina berth however, during that time I had also done a major strip-down and service of the steering system and replaced and re-glassed the babystay chainplate ( https://yachtcamomile.wordpress.com/job-list/chainplates/ ). Had it not been for this and the poor weather I feel I would have completed the job in around four days or about 48 working hours.







Leave a comment
Comments 0